DIY maternity photography tips and how my partner and I created beautiful lasting memories of my third trimester of pregnancy and so can you. We had been contemplating hiring a photographer. With so many things to pay for in preparation of our baby coming and our finances for taking care of baby after the birth, we decided to opt for a DIY photoshoot and I’m so happy with our results. Continue reading to see how we accomplished it.
DIY Maternity Photography Tip #1 The equipment we used:
Camera Tripod Stand
Before we got started taking photos we decided on how we were going to go about the process without the help of a photographer. What we decided on was using a tripod stand that was compatible with use of our camera phone, GoPro, or a legitimate camera. The cameras on our phones are actually quite nice as is expected in this day in age, so that’s what we ended up using.
The key factor in picking out a tripod stand was the height, the ease of use, and the price. We found our Tripod Stand on Amazon.com. Spend less. Smile more. and it was delivered in just a couple of days. The height was 62 inches which worked out great considering that is about the average height of any possible photographer we could have hired. The tripod stand also came with a Bluetooth remote that was super easy to connect to our phone and made taking photos so simple. The Tripod also adjusted to multiple levels of height. It adjusted to a horizontal phone attachment for photos as well as vertical. It had great mobility and positioned down and up or side to side. The stand was super affordable. We bought ours on sale for $19.99. It also adjusted into a selfie stick when not being used as a Tripod stand. The versatility for that price was a great investment and something we could continue to use for family photos in the future.
Our Outfit Choices
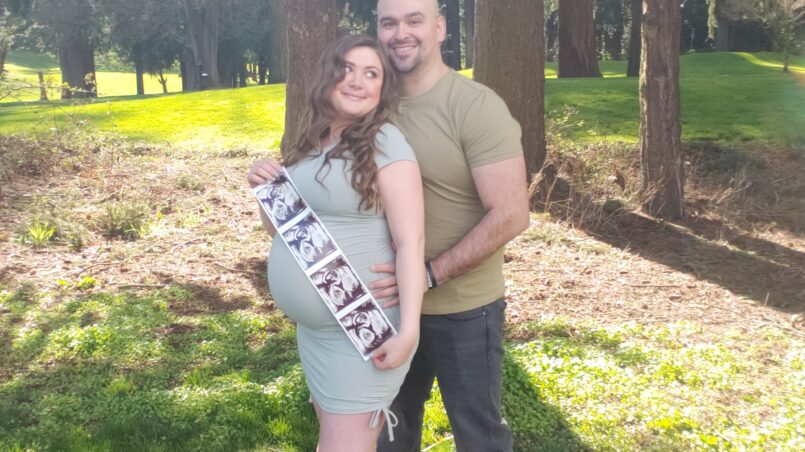
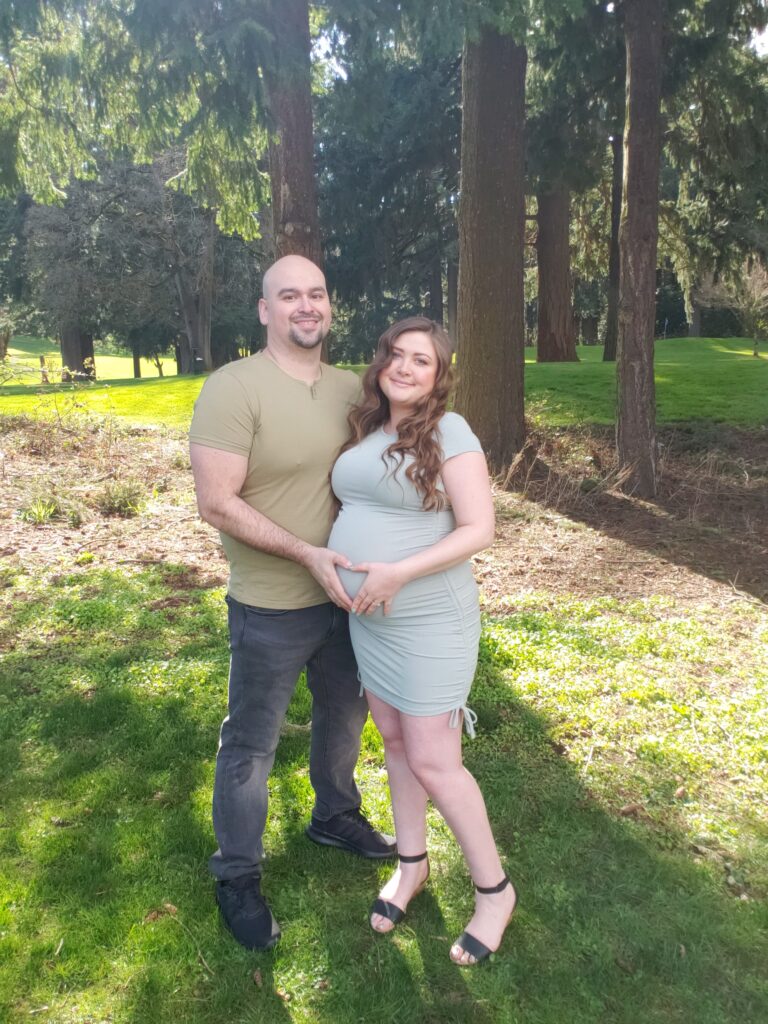
For outfits we wanted something somewhat casual but still purposeful and cleaned up. Our nursery is woodland themed, and I utilized the use of earthy toned greens when designing it and stuck with a similar theme when buying baby clothes as well. It only felt right that we carried on with the color scheme of earthy greens in our maternity pictures. Additionally to the purchase of our tripod stand, we did spend a bit to buy clothing to match. Still ultimately saving a very large amount of money by not paying for a photographer.
When buying clothing to go with our theme I think it’s important to note that we didn’t want to match greens so intensely that we were in the exact same shade and color. We didn’t want to fade into each other in our photos. Something to consider When wanting to match in photos. Its also Important to have a bit of contrast for the photos to turn out well. We bought a nice light Olive-green shirt for my partner and a formfitting light gray-green dress for myself. Another thing I will note, is that I purposefully bought a dress that was not made for maternity but was very stretchy so that it would cling to my curves and baby bump for the photos, but also allow me to continue to wear the dress after my pregnancy.
DIY Maternity Photography Tip #2 setting the scene:
Location and time
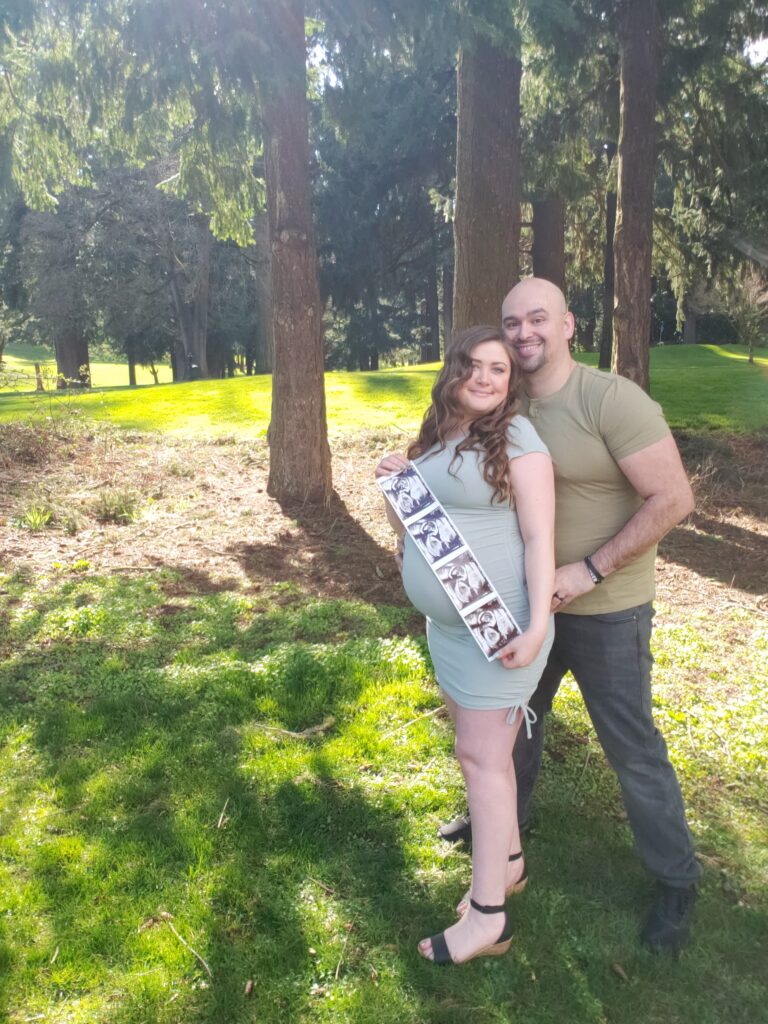
We chose an outside natural location for our DIY maternity photoshoot. Specifically, a park setting. This allowed us to use really nice natural light. A great chose is to use the “golden hour” for the perfect natural lighting in outside photo taking. That is the hour before sunset. Unfortunately, It is the time of year in the PNW for rain and clouds to be a typical occurrence. We had to use the opportunity for a dry sunny day when we had the chance. Not knowing when the weather could change up on us, we didn’t wait for the “golden hour”.
We instead chose our natural location wisely. In an area that had an open grassy area to set up shop. With a backdrop of just enough trees to both let the perfect amount of sunlight through while also taking advantage of the shade to not overexpose the camera to light. Have you ever tried taking a photo in the sun and your eyes are wincing from the light? Or how about the light on your backside that completely shaded your face and ruined what would have been the perfect pose? Having just enough light peeking through the trees at our backside made for some very beautiful, dare I say professional looking photos.
Props
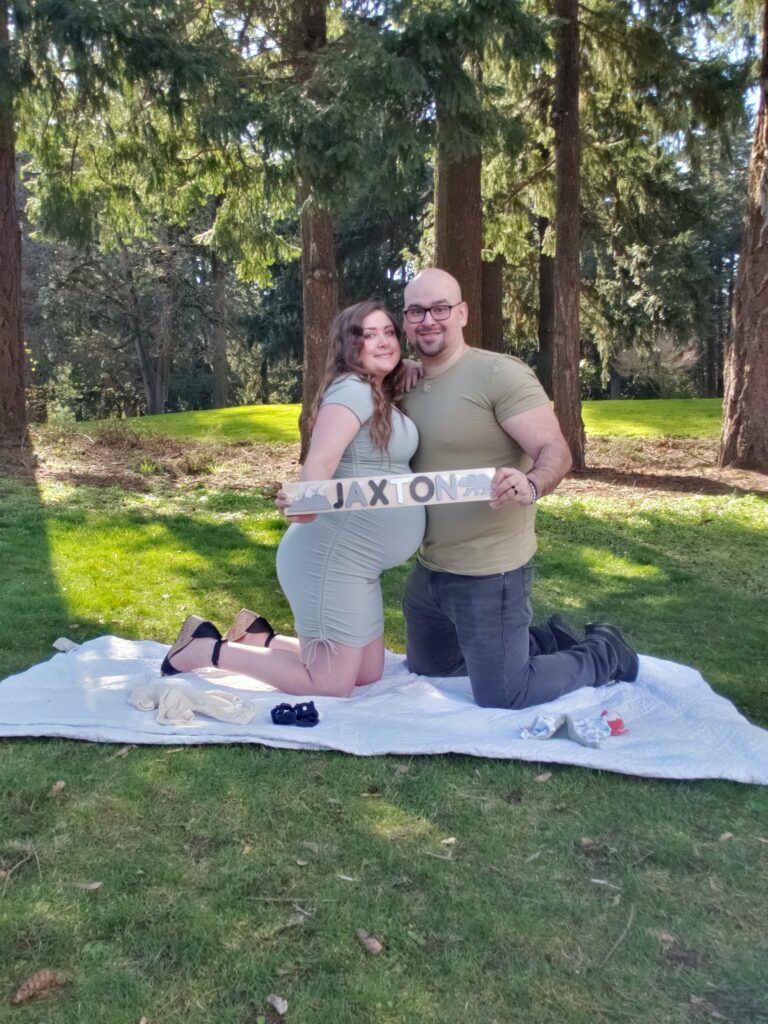
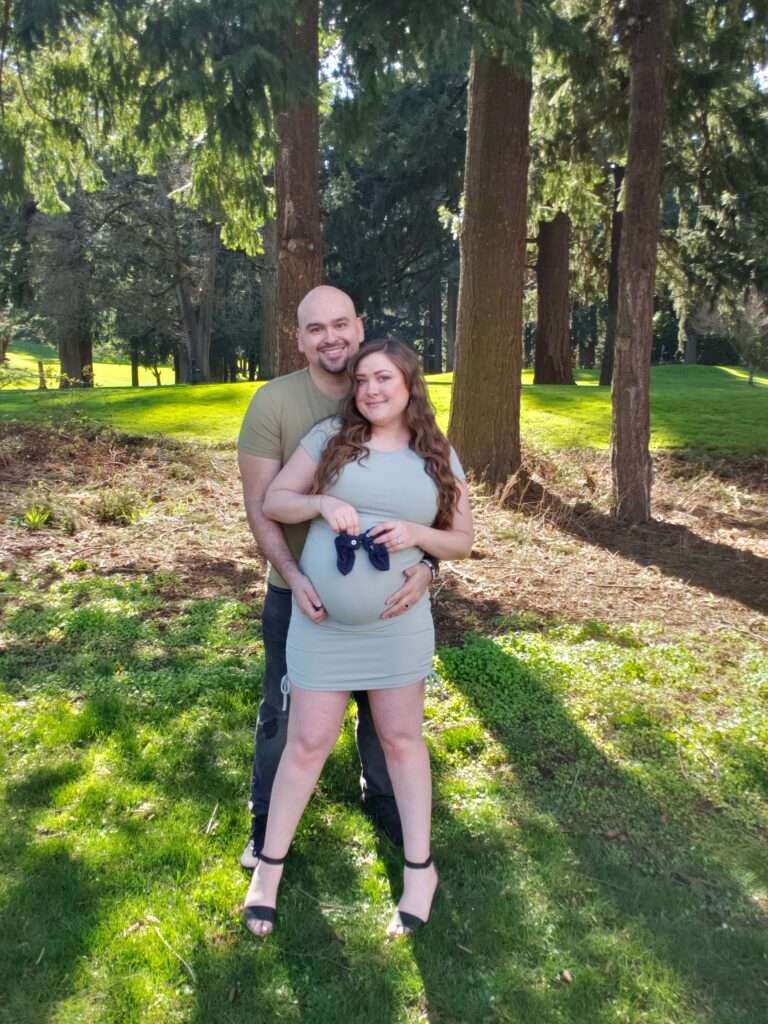
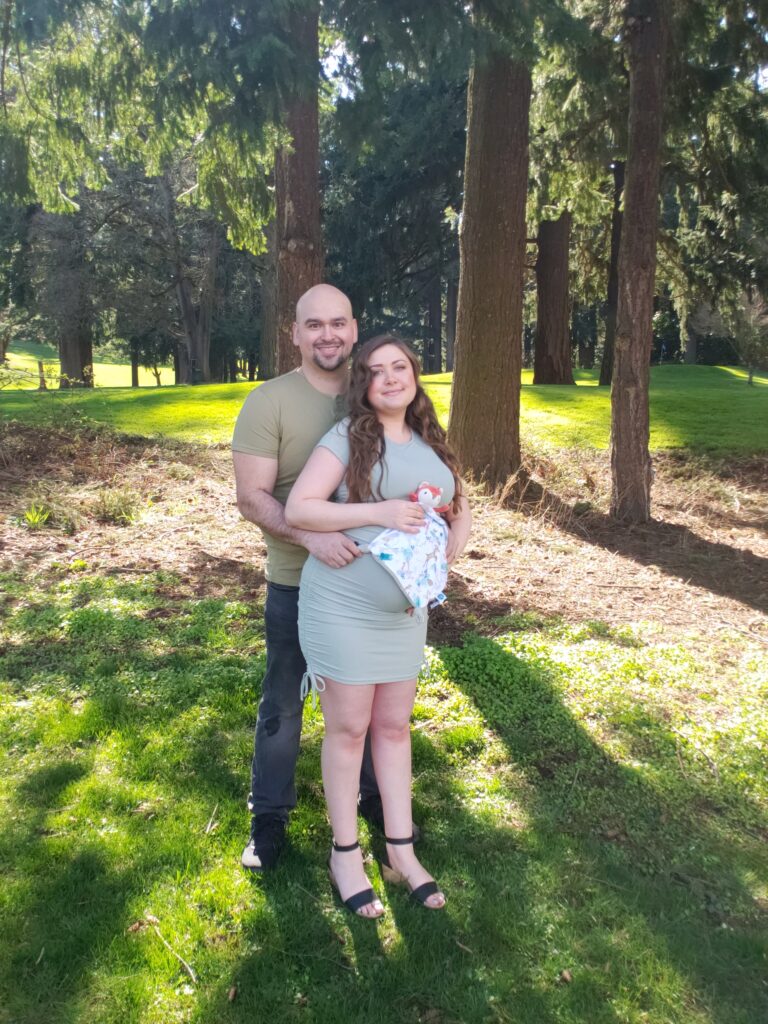
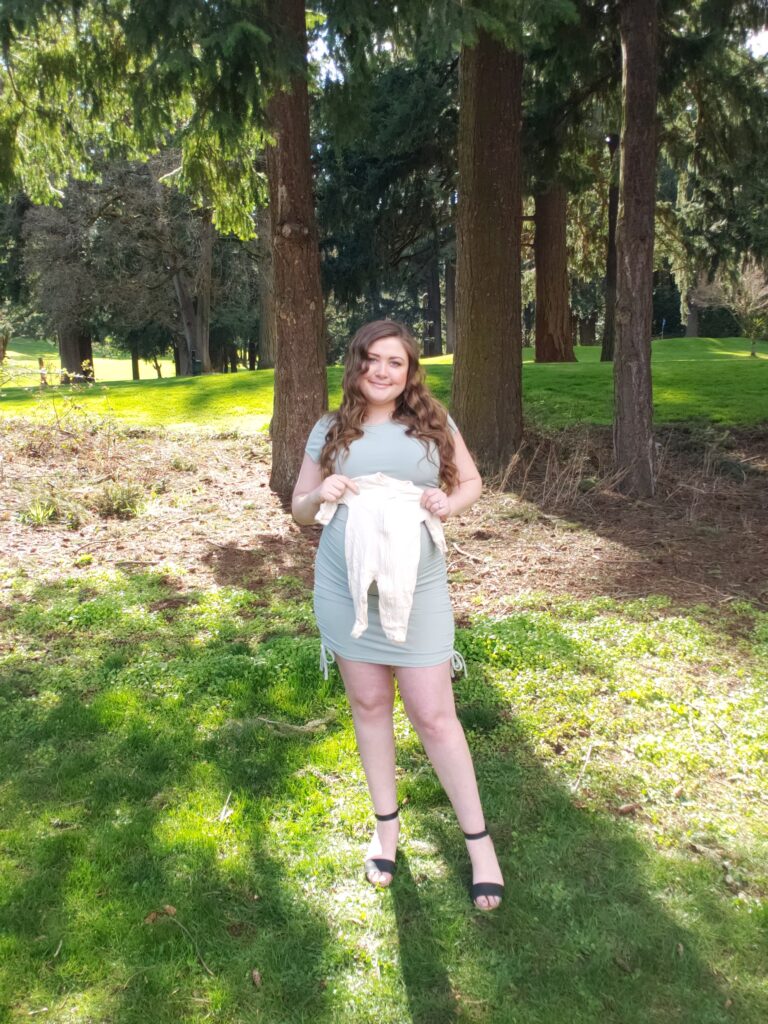
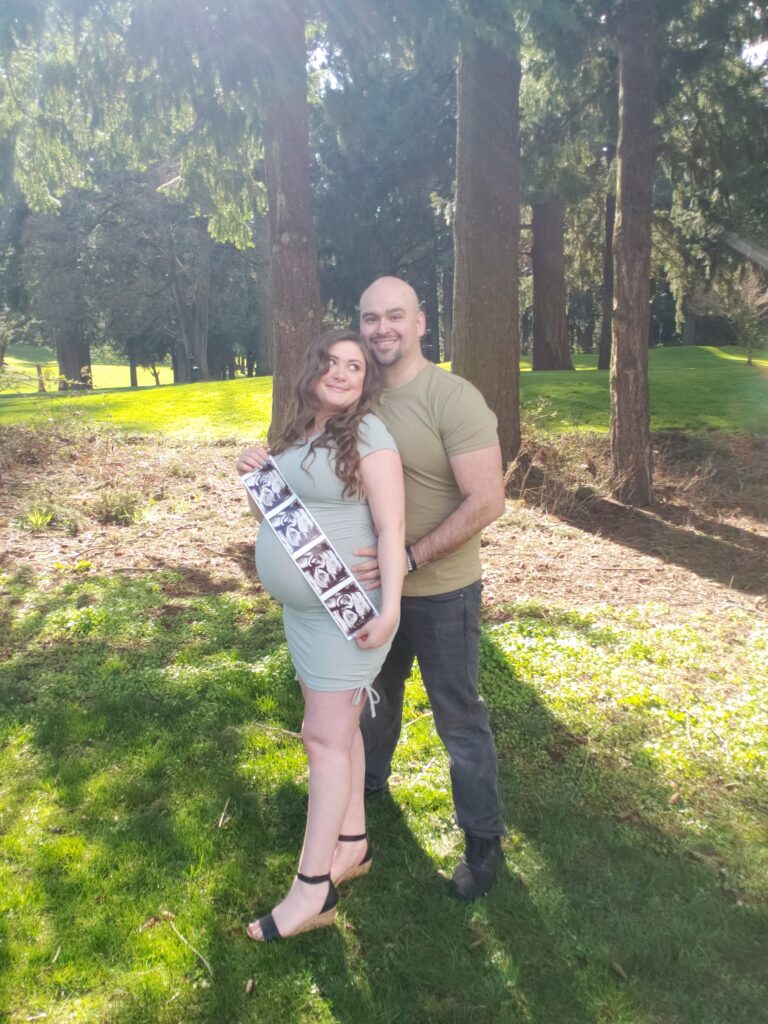
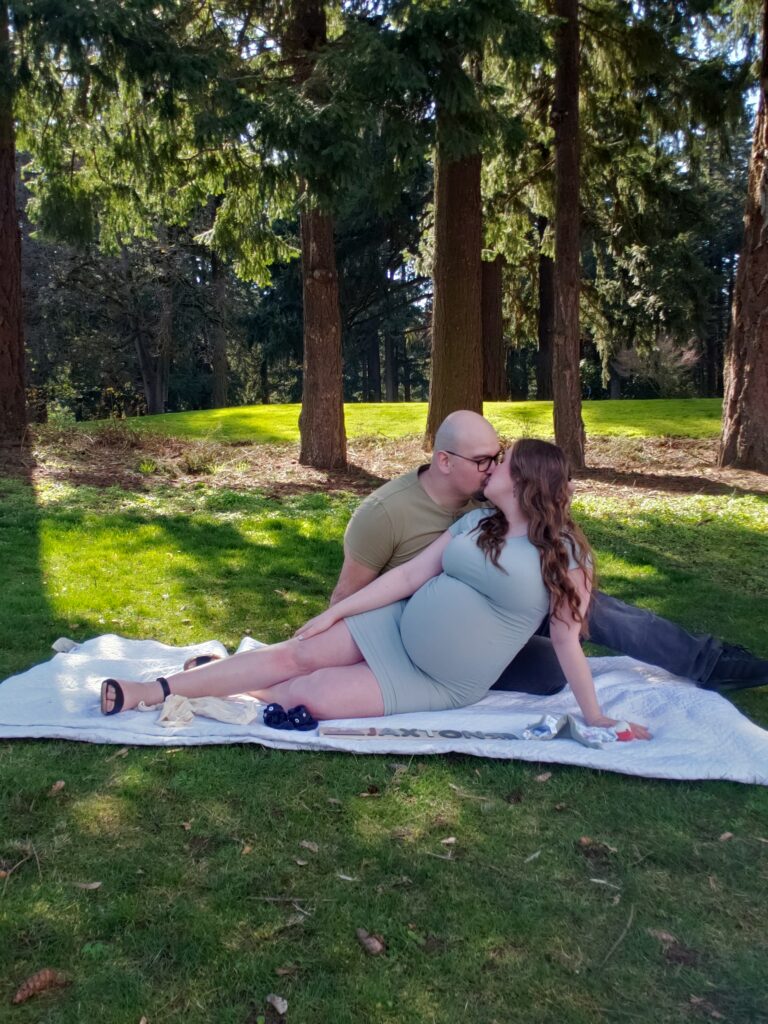
So, there we were, in our chosen outfits, my hair and makeup done, even nails painted to match my dress. We were at our chosen location with our backdrop of a few trees. We had set up our tripod stand, and our camera phone was at the right height and tilt to get started with picture taking. The last piece to setting the scene was, well, setting the scene I suppose. We brought a blanket to lay out with a few baby items to set as decoration and to use in some of our poses. We specifically brought a baby sleeper onesie, baby boys security blanket stuffy, little baby shoes, some of our ultrasound pictures of baby boy, and one of my favorite baby items, a personalized wooden puzzle with our babies name. The wooden name puzzle was perfect as a name sign in our pictures and just a fun idea if you are looking to announce your babies name at that time.
DIY Maternity Photography Tip #3 Figuring Out How to Pose:
Hand Hearts On Baby Bump
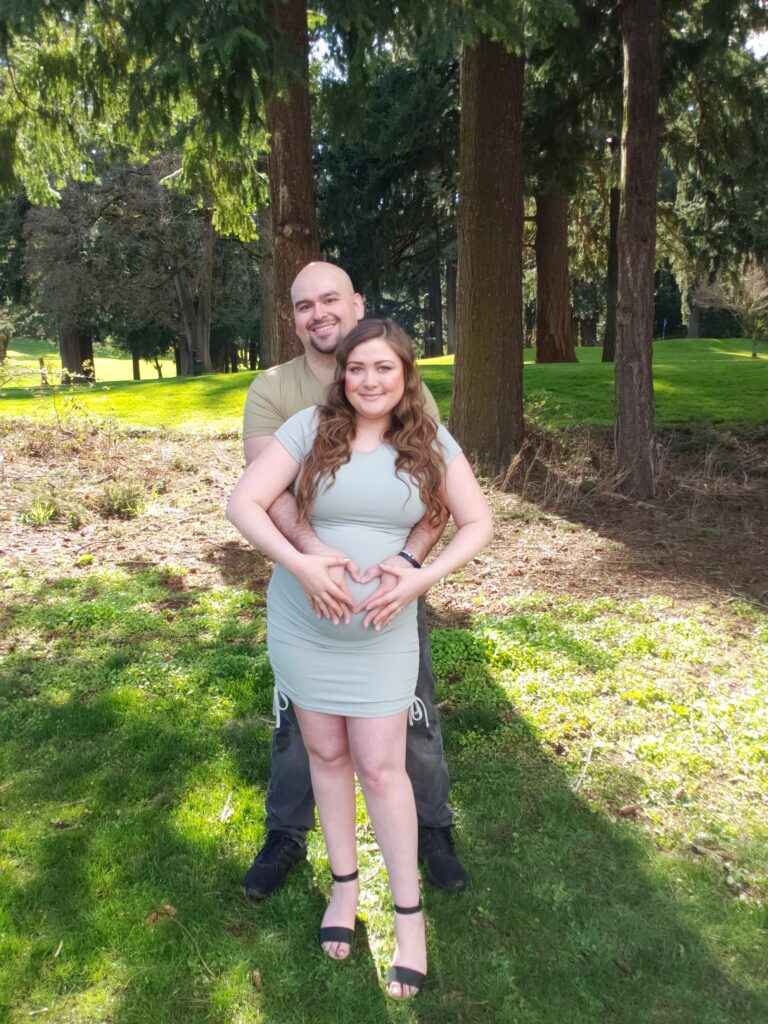
I’m pretty sure hand heart poses on the baby bump are a fan favorite. There are Two great ways to try out this pose. First way is to be side by side with your partner and use one of your partners hands as half of the heart and your hand for the other half of the heart. Second way is to stand in front of your partner while they hold you from behind and make a heart on your tummy with their hands. You can place your hands on top of their hands as well.
Use Your baby items as Props
place a cute baby item on top of your baby bump. Your partner can hold the baby item over your bump, or you can hold the item over your bump while they hold you. Or just take a few solo shots of just you holding the baby item over your tummy. Depending on the item, you and your partner can also hold out the prop together while you stand close to each other and embrace or hold hands.
Not Looking Directly at Camera
Try looking in another direction instead of head on at the camera. Looking down at your baby bump can be a beautiful shot. Or try looking at your partner with a sweet gaze. You can look up at them while they look down at your bump, or you can look into each other’s eyes.
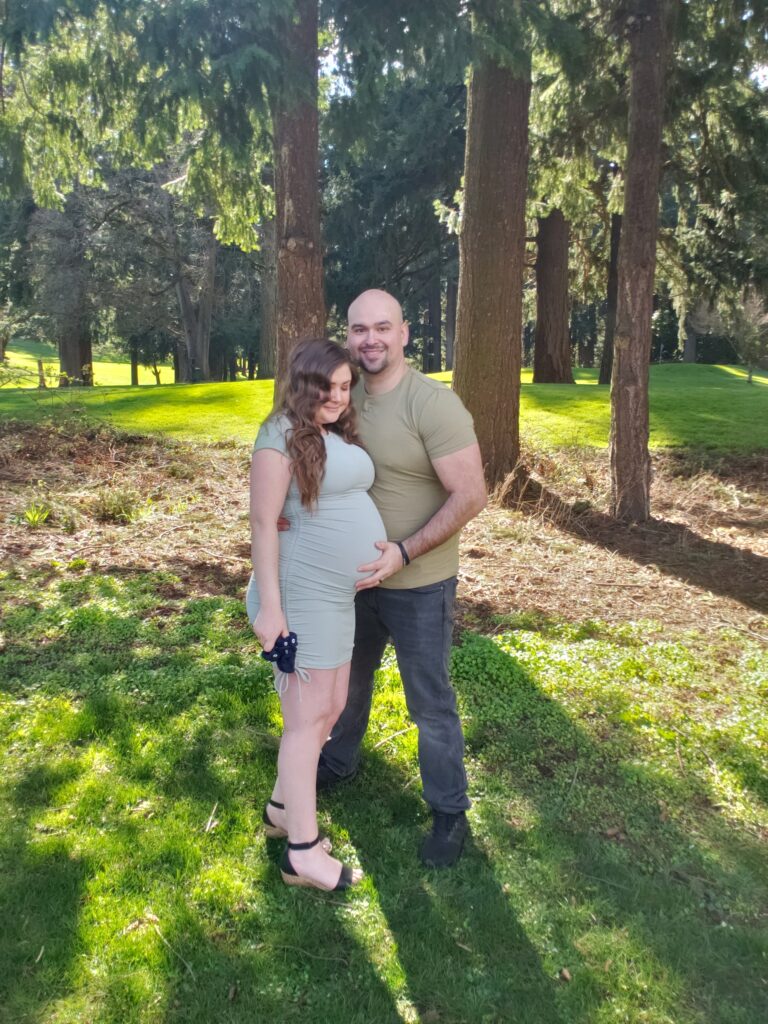
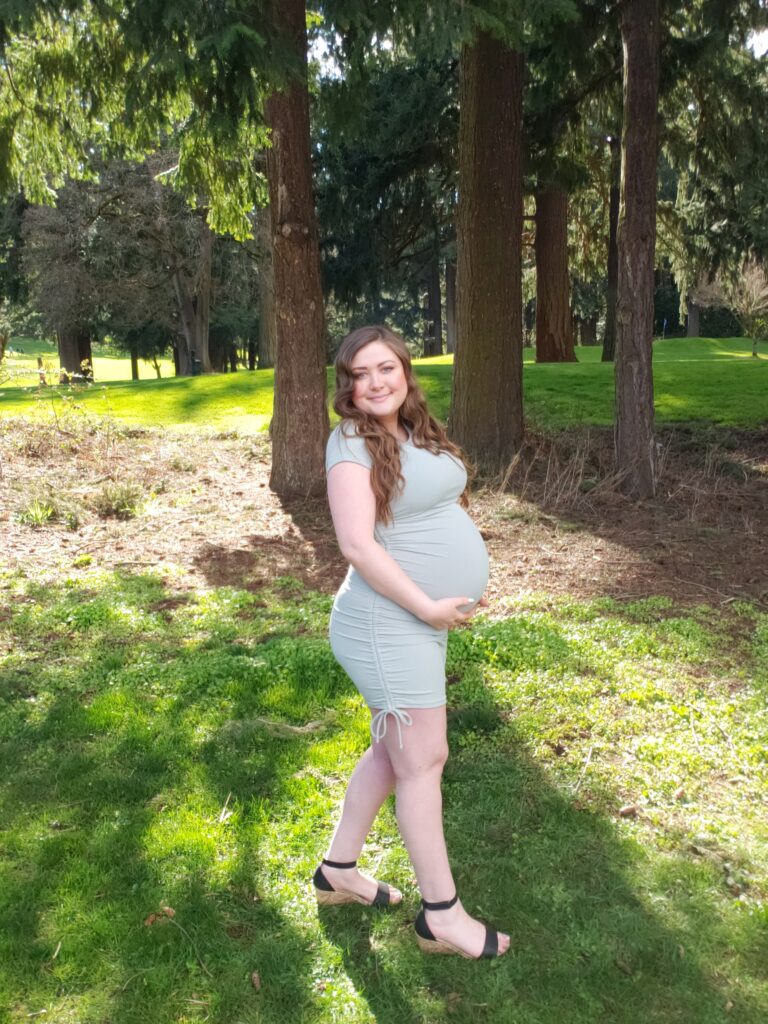
Holding the Bump
This is kind of self-explanatory. But, have your partner holding or caressing your bump. Or hold your own bump. There are many different ways to maneuver this pose. So, get creative with it!
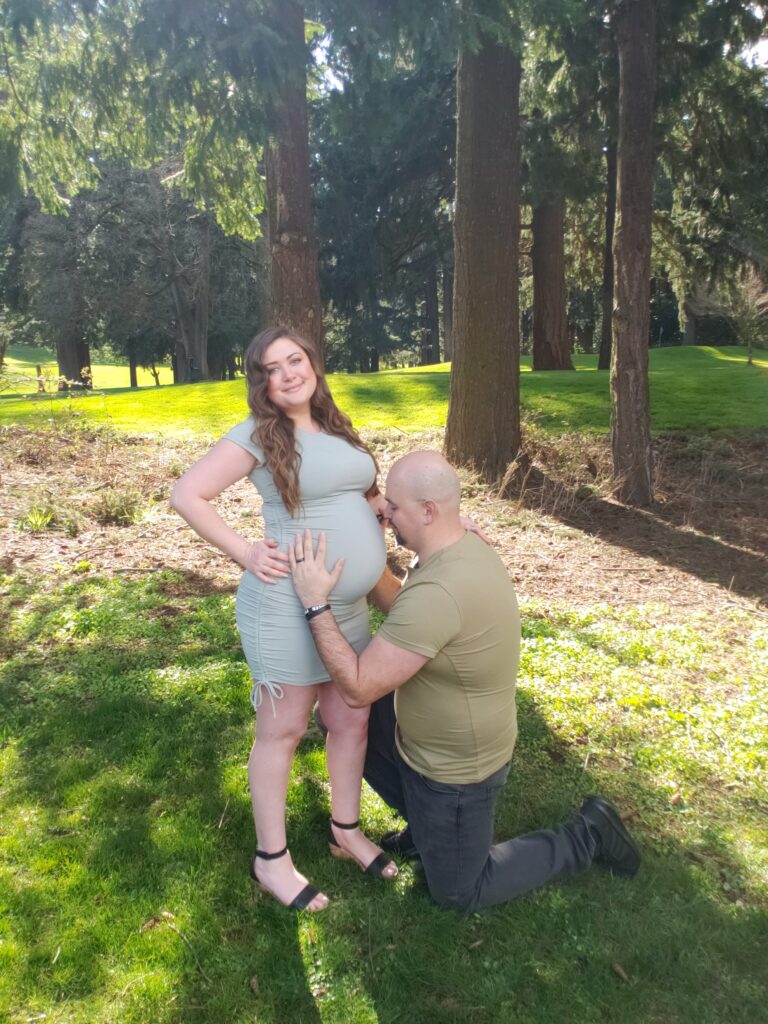
Partner Admiring Your Bump
Get some pics of your partner kneeling down and kissing or hugging your Bump.
General Posing Techniques
I think you get the general idea of holding, touching, and posing the main star of this show, your baby bump. Think about the movements around these poses. Get some pictures standing, kneeling, and laying. My partner and I got some cute pictures of us laying on our blanket in the grass. I laid on my side feet pointing left and my partner laid on his opposite side with his feet pointing right. We took different variations of pictures side by side or my partner from behind. We got side views of the bump and front views. Pictures of kissing, Holding, and caressing. Think about using the natural curves of your body and where you place your hands. Bend the knees and bend the elbows. Try not to just stand straight up and down. Don’t be expressionless. No matter how large and tired you may feel at this point in the pregnancy, these are moments you are going to want to capture and look back on. So, Smile!

If this post inspired you or you found the tips useful, let me know in the comment section below. There are more techniques for posing with not just a partner but also with a family, a first child, or children if this isn’t your first pregnancy or maternity photography rodeo. This is my first pregnancy and so this advice is just based off of my own personal experience. If you’d like more mommy content like this check back into my blogsite for more maternity and mom related posts. Well-Rounded Woman PNW – Various experiences that can inspire, educate, and be a fun read


I absolutely love every idea and tip that you have mentioned, great ideas and your shared story, which I know many new or young mothers can relate to your experiences. I support you totally 💯
Great Read!
Definitely referring back to this article for our shoot.